Let's Be Honest, Your Product Photos Could Be Better
You’ve poured your heart, soul, and probably a concerning amount of caffeine into curating the perfect products for your store. You know they’re amazing. Your mom knows they’re amazing. But does your Instagram feed know it? If your product photos look like they were taken on a flip phone during a minor earthquake, the answer is a resounding no.
In today's visually-driven market, a grainy, poorly-lit photo is the digital equivalent of a dusty, uninviting storefront. In fact, studies show that 93% of consumers consider visual appearance to be the key deciding factor in a purchasing decision. Poor photos don't just look bad; they actively cost you money. Before you panic and start pricing out camera equipment that costs more than your car, take a deep breath. The solution is already in your pocket, and it’s not a magic wand. It’s your smartphone.
That’s right. You have the power to create crisp, professional, "add-to-cart-right-now" images without a fancy DSLR. You just need to learn how to use it. So, let’s banish those blurry, shadowy pictures for good and create some images that actually do your products justice.
The Non-Negotiables of Smartphone Photography
Before you get creative, you have to master the basics. These aren’t just friendly suggestions; they are the fundamental laws of not making your products look sad and lonely online. Ignore them at your own peril.
Let There Be Light (But Not That Light)
Lighting is the single most important element in photography. It can make a $10 trinket look like a priceless artifact or a luxury handbag look like a cheap knockoff. Your number one goal is to find good, natural light. Position your product near a large window on an overcast day or in a spot with indirect sunlight. Direct, harsh sunlight creates ugly, dark shadows that obscure details.
And for the love of all that is profitable, do not use your phone’s built-in flash. Ever. It’s a one-way ticket to a flat, washed-out photo with a weird, ghostly glare. If you’re struggling with shadows, grab a piece of white foam board or even just a sheet of paper. Place it opposite your light source to bounce soft, flattering light back onto your product. It’s a simple, cheap trick that makes a world of difference.
The Background Check: Keep It Clean
Is that your half-eaten lunch in the background? Are those shipping boxes from last week photobombing your beautiful new product? A cluttered background is distracting and screams "amateur." Your product needs to be the undisputed star of the show. You don’t need a dedicated studio; you just need a clean, simple surface.
A solid-colored wall, a roll of craft paper, a piece of clean fabric, or even a poster board from the dollar store can serve as a perfect, non-distracting backdrop. For a classic, seamless e-commerce look, you can create a "sweep" by curving a large piece of paper from the wall down onto a table, eliminating the horizon line. If you're going for a "lifestyle" shot, make sure the environment is still intentionally styled and clean. The goal is curated, not chaotic.
Stability Is Your New Best Friend
Human hands are great for many things—unpacking inventory, waving at customers, gesturing wildly while explaining a new promotion. Holding a phone perfectly still for a photo is not one of them. The slightest shake can result in a soft, blurry image that no amount of editing can fix.
The solution? Take your hands out of the equation. A small, inexpensive smartphone tripod is one of the best investments you can make. It guarantees a sharp, stable shot every single time. If you’re in a pinch, you can improvise by propping your phone against a stack of books or a heavy mug. To take it one step further, use your phone's self-timer function. Tapping the shutter button can cause a tiny jiggle, but a 3-second timer ensures the phone is perfectly still when the picture is taken.
From Clicks to Bricks: Bridging Your Online and In-Store Game
So, you’ve followed the rules. Your product photos are now so stunning they could make a grown person weep. You’re posting them online, and people are taking notice. Your social media engagement is up, and more importantly, people are being lured from their couches into your actual, physical store. Now what? You have to connect that stellar online impression with an equally impressive in-store experience.
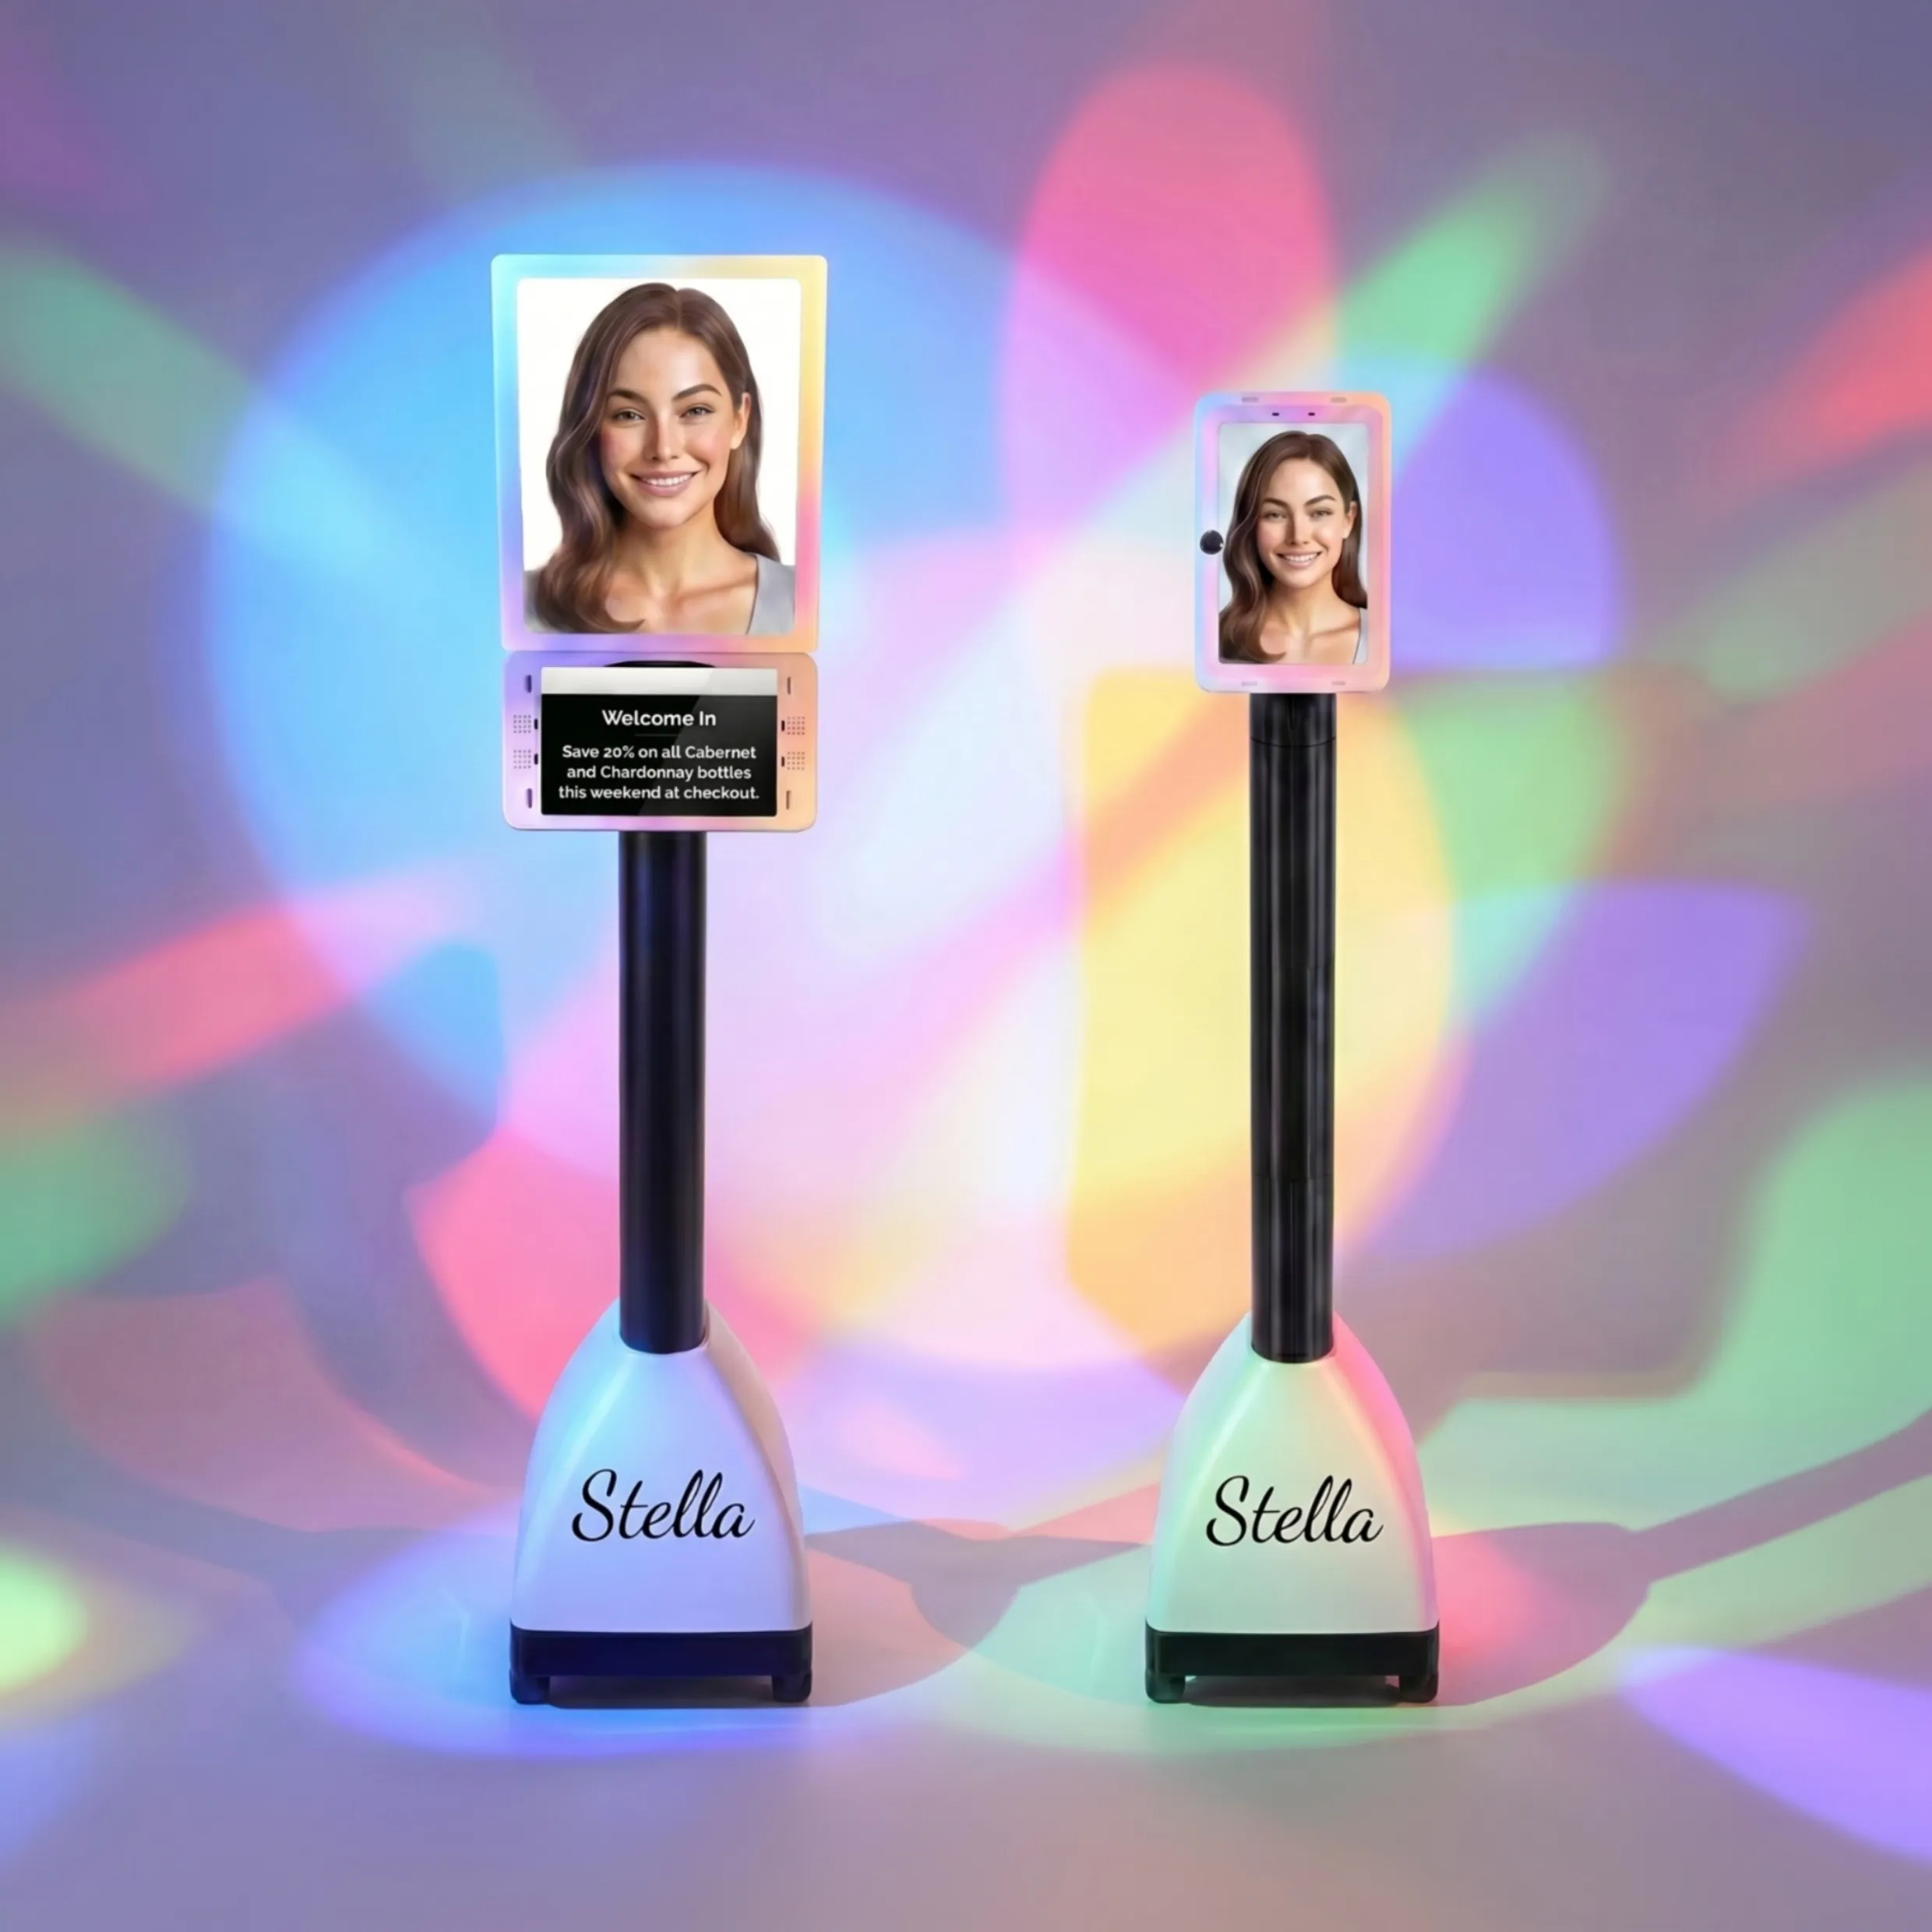
Stella: Your In-Store Hype Machine
This is where the magic really happens. A customer sees your gorgeous new photo of a featured handbag collection, and they come in to see it in person. The moment they walk through the door, they need to be engaged. That's where Stella, your always-on, always-friendly robotic retail assistant, comes in. Instead of a customer wandering around aimlessly, she creates a seamless transition from the digital world to your sales floor.
Imagine this: Stella greets every single shopper with, "Welcome in! If you saw our new Italian leather handbags online, you have to see them in person. They're right over here, and we just got a new color in today!" Suddenly, the product they admired online is front and center, their interest is validated, and a conversation has started—all without your human staff having to greet every single person. She ensures the effort you put into your beautiful photography translates directly into in-store discovery and, ultimately, sales.
Level Up Your Shots: Simple Tricks for Pro-Level Polish
You’ve nailed the basics. Your photos are clear, well-lit, and focused. Now it's time to add a layer of polish that will make your competitors wonder which high-end agency you hired.
Master the Angles (It's Not Just for Selfies)
A single, straight-on shot is fine, but it rarely tells the whole story. To truly showcase a product, you need to capture it from multiple angles. Think like a customer: what would they want to see?
- The Hero Shot: A straight-on or 45-degree angle shot that shows the product clearly.
- The Top-Down (Flat Lay): Perfect for arranging clothing, accessories, or food items in a visually pleasing layout.
- The Detail Shot: A close-up that highlights texture, craftsmanship, or a unique feature. Think the stitching on a wallet or the clasp on a necklace.
Turn on your phone’s camera grid in the settings. This helps you use the "rule of thirds," a simple composition principle that makes photos more dynamic. Instead of centering your product, try placing it where the grid lines intersect. It’s a small change that makes a big visual impact.
The Magic of Post-Production (aka Editing)
Let's clear something up: every single professional photo you've ever admired has been edited. Editing isn't cheating; it's finishing the job. This doesn't mean slapping a garish, high-contrast filter on everything. It means making subtle adjustments to make your photo pop.
You don't need expensive software. Your phone's built-in photo editor is surprisingly powerful, and free apps like Snapseed or Adobe Lightroom Mobile offer even more control. Focus on these four simple adjustments to start:
- Brightness (Exposure): Make the photo a little brighter to appear more airy and professional.
- Contrast: Add a slight boost to make the darks darker and the lights lighter, which adds "punch."
- Saturation: Increase this just a tiny bit to make the colors more vibrant, but don't overdo it unless you want your products to look radioactive.
- Sharpness: A small bump in sharpness can make the details look incredibly crisp.
The key is subtlety. Your goal is to enhance the photo, not transform it into an unrecognizable piece of art.
A Quick Reminder About Stella
While you're becoming a product photography whiz, don't forget about perfecting your in-store experience. Stella, your friendly AI retail assistant, is always ready to greet customers, promote the products you've so beautifully photographed, and free up your team to focus on closing sales. She's the reliable, affordable team member who never calls in sick.
Conclusion: Stop Wishing, Start Shooting
There you have it. You don't need a four-year degree in photography or a trust fund to create beautiful product images. You just need the device you're probably reading this on, a little bit of natural light, and a commitment to ditching your old, blurry ways. A stable phone, a clean background, a few smart angles, and a touch of editing are all that stand between you and a product feed that truly reflects the quality of your brand.
So, your next step is simple. Pick a product, find a window, and start practicing. Experiment with different angles and editing styles until you find a look that feels like you. Your online store, your social media accounts, and your bottom line will thank you for it.